It’s time for another product round-up. Take a look at some exciting cool tools and innovative products you shouldn’t be without.
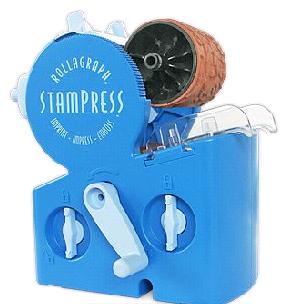
Rollagraph StamPress: Create quick embellishments for your artist trading cards, greeting cards and polymer clay projects. Using interchangeable rubber stamp wheels and different inks, the StamPress machine can apply rubber stamp designs to ribbon, foils, paper strips and more. I never seem to get consistent ink coverage when I stamp and I worry about slippage, too. No more of that because this gadget does the work for you. StamPress comes with an instructional DVD that includes a 120 minute demo. For more info, go to clearsnap.com.
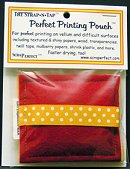
Perfect Printing Pouch: Vellum and other specialty papers always seem to slip in my inkjet printer and I’m rarely satisfied with the results. I've had friends suggest that I iron vellum to freezer paper and run it through the printer, but that always takes too much time. The Perfect Printing Pouch allows me to print on more than just paper -- try it for printing on vellum, textured paper, transparencies, and twill ribbon. It will help you avoid that awful smearing or bleeding and your paper will dry faster, too. For more info, go to scraperfect.com.

Fiskars Squeeze Punch: Whenever I use paper punches, I have to guess where my design will appear on the reverse side of decorative paper after I punch. Even worse, sometimes I don’t apply enough pressure so the hole ends up half-punched. Fiskar makes "reversed" punches – you see the punch mechanism while you’re working – and because you squeeze the punches, you can use them while you’re sitting down. Now I see where my punch hole is lined up and whether or not I’m using the punch correctly. Plus, I don’t have to stand up, lean on the table and apply brute force to get a perfect punch, either. For more info, go to fiskars.com.
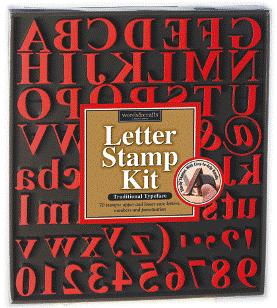
Words and Crafts Stamps: These sets of alphabet stamps have small individual handles, rather than bulky wood blocks. I hate those ghost shadows that appear from my rocking the stamp or from stamp rubber that's been trimmed poorly, so I was glad to find these. The stamps store away in a minimum amount of room and are better for positioning your stamp exactly where you’d like it on your project. No guessing! The sets come in several letter fonts: traditional, breezy, classic and smarty. For more info, go to wordsandcrafts.com.
Article Description: Here are more cool tools and innovative products that you night want to add to your crafts room wish list.
Tuesday, February 13, 2007
Tuesday, February 06, 2007
Project - Slip a Tiny Love Note Inside a Decorative Matchbox
For this Valentine's Day, tell a significant other how much you care by creating a miniature accordion-fold card nestled inside a romantic matchbox. Write your own sentiments on the hand-made insert or collage it with rubber stamps and paper scraps. Slip a tiny square of wrapped chocolate inside or tell a story with tiny photos.
Secret Lover Matchbox Valentine (click to enlarge)
Materials & Tools
· Empty cardboard matchbox, small pocket size
· Shimmering Metallic Acrylic Paint in Rose Pearl, by Plaid/FolkArt
· Small Foam Paint Brushes
· 2-inch square of gold metallic sticker paper
· Armada Corner Punch Set, scalloped with tiny heart punch
· 2-inch piece of Gold Metallic Fancy Ribbon, 1/8" Wide
· Craft knife
· Terrifically Tacky Tape, by Provo Craft
· Black solvent inkpad, like Jet Black by StazOn
· Scrap of gold metallic card stock
· Bone folder
· Good pair of comfortable, teflon-like coated scissors, like Velvet Touch Scissors by Armada
· Metal ruler or straight edge
· Two toned paper shopping bag from your Victoria's Secret purchase
· Face Set Rubber Stamp Set, Stamp #1, by Hampton Art Stamps
· Stampin' Words Rubber Stamp Set, Item #333 (Hold/Kiss/Thrill) by Rubber Stampede
· Heart shaped Rubber Stamp
· Scraps from paper sewing pattern
· White paper glue
The Steps
(Click to enlarge images. Click back button to return to article.)
1. Using the rose acrylic paint and a foam sponge brush, paint both the inside and outside of an empty cardboard matchbox. Let it air dry.
2. Cut a 2-inch square out of gold metallic paper. I used left-over sticker paper, but you can use any gold paper you like, including decorative paper or foil.
3. Using the corner heart punch, punch three corners of the gold paper. Save the small hearts. Cut one corner off (about 1.5 inch piece) Apply the gold paper at an angle to the top of the matchbox, pushing the loose ends under and inside. Apply two of the saved hearts, aligned underneath the heart cut-out.
4. Using a craft knife, cut a 1/8-inch slit in one end of the matchbox tray. Now fold the gold ribbon in half and push it through the slot from the inside. I used a coffee stirrer to push my ribbon through the tiny slit. Hold the ribbon in place on the matchbox tray bottom using tacky tape. Now put your index finger inside the looped ribbon to create a handle of sorts -- if your ribbon has a wire edge, it will hold its shape.
5. Using the black solvent ink, rubber stamp a face onto a small piece of gold card stock. You can emboss the image with clear embossing powder if you like to add some dimension. After the image dries, cut around it until the cardstock is about 1.25 x 1.75 inches. Adhere the stamped image inside the matchbox bottom using tacky tape.
6. After you shop at your favorite Victoria's Secret store, save the paper shopping bag. Cut a strip from the bag that measures 1.25 x 9 inches -- you'll use this as the base for your accordion fold insert. By the way, you can use any paper for the insert -- I like to recycle all kinds of paper and the VS bag seemed like the perfect fit.
7. Fold one end of the strip to create a 1/2-inch or less tab to fit inside the matchbox tray. Now fold the remaining bag scrap back and forth to create an accordion-style insert. Use a bone folder to crease the folds for best results. Finish off the card base using the heart corner punch.
8. Flip the accordion insert over and start decorating. On my insert, I stamped words and a heart in black ink. To create a light collage effect, I applied torn scraps of left-over sewing pattern paper on top of the words using white paper glue. If you collage, let it dry overnight. You might also consider writing a love note on the insert, using gel or calligraphy pens.
9. Attach a small piece of tacky tape to the short accordion tab and affix it inside the matchbox tray. Now slip the accordion inside the matchbox tray and slide the tray into the cover. Happy Valentine's Day!
Product Resource Guide
· Most project photos taken with a 5.0 MP resolution KODAK EASYSHARE DX4530 Zoom Digital Camera
· Metallic Acrylic Paint in Rose Pearl
· Small Foam Paint Brushes
· Small piece of gold metallic edged ribbon
· Bone folder
· Tacky tape
· Staz-On Ink Pad in Jet Black
· Browse for Paper Crafts Books at Amazon.com
Article Description: For this Valentine's Day, tell a significant other how much you care by creating a miniature accordion-fold card nestled inside a romantic matchbox.
Tuesday, January 23, 2007
Project - Embellish a Small Paper Tag Purse
You can do more with tag punches and tag dies than stop after making a paper tag. You can take it a step further by folding those tags into cute little paper purses for use as 3D embellishments. This project makes a finished paper purse that measures about 2 inches by 3 inches, without the handle.
Paper Tag Purse (click to enlarge)
Materials & Tools
• Thickly textured decorative paper or wallpaper scrap in Turquoise
• Sizzix System - Die Cutting Machine
• Sizzix Large Scalloped Tag Die
• Wide gold opaque ribbon, torn at an angle (purse edges)
• Turquoise blue feathers (small broken pieces to stick here and there)
• Silver-colored metal initial charm (attach to purse flap with a brad)
• Glass beads (add with wire woven through the tag holes)
• Blue scrapbooking brad (to affix the letter charm)
• Dark blue wire, wrapped around a bamboo stick to make it "spring"
• Short metal bead (or ball) keychain in blue (to create a purse handle)
• Bead chain connectors (to connect the purse handle to the tag top)
• Purse-shaped plastic button in gold
• Glue or Tacky tape (to seal the purse edges and attach the wide ribbon)
• Gold glitter glue (to decorate the outside edge)
• Tiny hole paper punch (to create extra holes for securing charms, beads or chains)
• Pop-dots or foam adhesive squares (to attach the purse button)
The Steps
1. Cut a large tag from thickly textured decorative paper. My sample uses blue paper made from Tyvek material, but you can use any thick paper of your choice. The thicker and more textured, the better. In fact, if you have any wallpaper scraps laying around, these are a great substitute.
2. Fold the tag in uneven threes, using the top of the tag as the opening flap for the paper purse. Essentially, you fold the bottom of the tag up, crease the bottom, then fold the tag top down.
3. Secure edges of the purse with glue or tacky tape on the inside edges. For a different look, consider stitching the edges instead.
4. Embellish the front of the purse as you wish. My embellishments are noted in the materials list above. You can apply glitter, beads or anything else you like.
5. When applying the wire, beads and letter charm to the top of the tag, I punched a small hole near the big tag hole for stringing and added stability.
6. Punch holes on each side of the top flap for your purse handle. I used a short metal bead chain from a discarded keychain. Check your local plumbing or hardware store for the chains. You can cut a chain that's too long, if you can't find a short chain. You can also spray paint a nickel chain to match your paper. Alternately, fashion a handle out of ribbon, fiber or rope.
7. Keep the chain from falling out of the purse flap holes by adding the clasps or connectors that come with bead chain. If you use ribbon, fiber or rope, knot the ends to hold it in place.
8. Using pop-dots or adhesive squares, add the finished paper purse to the front of a handmade greeting card, the top of a cardboard box or an altered book page. Or give it to your favorite little girl for use in her doll collection.
Product Resource Guide
· Project photo taken with a 5.0 MP resolution KODAK EASYSHARE DX4530 Zoom Digital Camera
· Decorative Paper at Amazon.com
· Sizzix System - Die Cutting Machine at Amazon.com
· Browse for Paper Crafts Books at Amazon.com
Article Description: You can do more with tag punches and tag dies than just make a paper tag.
Labels:
altered art,
collage,
creative tags,
embellishments,
paper crafts,
paper tags,
tag art,
terrific tags
Tuesday, January 16, 2007
Product Round-Up - Paper Crafts Goodies To Die For
While browsing paper crafts magazines and visiting crafts shows, I came across some cool tools and products that I wanted to share with you, along with some ideas on how to use them. Check these out:
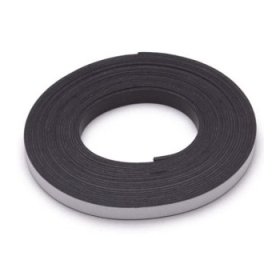
Magnet Tape: This struck me as a great way to get a new look continuously from my coffee table art. By attaching a piece of scrap ferrous metal to the cover of an altered book or journal, I can make movable embellishments using magnet tape. Just cut or tear off a piece of magnet and stick it to the back of a photo, tag or letters and watch while house guests have fun during a get-together. Hint: Keep a digital camera nearby to record your friends' creativity. I like to work with a magnet tape roll that's about .75 inch wide, but you can find them in half-inch widths, too. No matter, there’s plenty of length for several projects. For more info, go to Amazon.com.
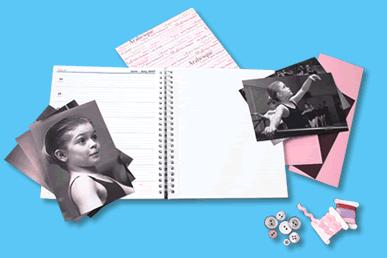
MyBook – The Adaptable Planner: Ever look back and wonder what you were doing the week you created a certain project? What inspired you to use a certain paper crafts technique or explore a certain theme? MyBook can help. With its blank and calendar pages, it’s a great way to combine journaling, scrapbooking and altered art into one. And you can work on it all year long while you note your activities at the same time. MyBook has see-through covers and archival pockets, so use it to store theatre tickets and other memorabilia. It comes in two sizes (Small 4" x 6"; Large 6" x 8"). Included are ink jet inserts that enable you to print digital art or just add three dimensional tags, letters, and pictures to the pages to make it truly a one-of-a-kind creation. Rubber stampers and scrapbook fans will love this planner, too. For more info, go to mybookplanner.com.
Paper Tagger: This handheld plastic gun uses those thin plastic tabs you see on retail store apparel, but with a twist – the tabs are colored. Use it to attach letters, tags, soft charms, and whatnot to your altered books or other paper arts projects. One nice thing is that you can just as easily remove embellishments attached with this tool, should you ever change your mind or want to revamp a project. The needle is extra fine so you shouldn't have to worry about holes left from moving items around. A starter set comes with the gun, 1000 tagger tails, assorted eyelets, charms and tags. By the way, it won a Craft and Hobby Association Innovations Award. For more info, go to aroundtheblockproducts.com
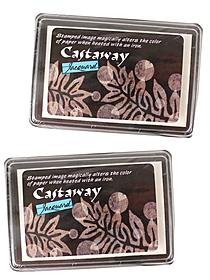
Castaway Stamp Pad: This winter, I’ve been experimenting with several different techniques for creating snowflakes on paper. Well, here’s the best way I’ve seen yet. With this product, you can change the color of your colored paper by applying heat. First stamp your snowflake design on colored paper using the special inkpad then simply run over your paper with a heated iron. Just like magic, the color in the stamped area fades away and you have the soft, subtle look of a winter snowfall. I'm so glad I don't have to tolerate those smelly and messy bleach incidents anymore. And the results with the Castaway are more dramatic than using clear embossing powder. I don't have to wait for the paper to dry, either. For more info, go to jacquardproducts.com.
That’s it for my paper crafts product round-up. Do you have products you can't live without? Share the wealth and tell a friend.
Article Description: While browsing paper crafts magazines and visiting crafts shows, I came across several cool tools and innovative products that I wanted to share with you.
Sunday, January 14, 2007
Best Practices in Paper Crafts – Tips from the Experts
There are dozens of books available for both the budding and experienced paper crafter. But which book do you buy? In addition to the types of projects found in each, how about evaluating books based on the real world advice they provide? Here is a sampling of tips that you can use immediately in your next paper crafts projects, complete with credit for the talented and insightful authors who penned them.
"When making a multi-material book, be sure to take into consideration the thickness of your pages. A combination of thick and thin pages is preferable to avoid making the book so thick that it can’t be closed and always yawns open."
"Cardboard is very easy to alter and is extremely lightweight. Experiment with inks, embossing powders or fabric dyes to give your chipboard and cardboard a facelift."
Expert Source: Carol Winger and Tena Sprenger, in their book "Artful Memories: Create One of a Kind Scrapbook Pages, Memory Books and Framed Art." North Light Books, 2006. ISBN 1-58180-810-0
"You may wish to apply glaze to brass eyelets to hold them in place once they have been inserted."
"When punching shapes from Washi paper, "place a piece of scrap paper underneath for stability and ease of punching."
Expert Source: Laurie Goodson and Betsey McLoughlin, in their book "Altered Books: Special Effects." Design Originals. ISBN 1-57421-478-0.
"It’s O.K. if your words or images fall off the page! Whether purposely or accidentally, having only half a stamped image, at the edge of your page can suggest repetition, continuous movement, or fragmented or harried feelings."
"When in doubt, make it big. Use bigger lettering and make a bold statement!"
Expert Source: Karen Dinino and Linda Woods, in their book "Visual Chronicles: The No-Fear Guide to Creating Art Journals, Creative Manifestos & Altered Books." North Light Books, 2006. ISBN 1-58180-770-8
"Using short, jabbing motions will help you get good coverage over the surface of (a) brayer."
"Stippling uses very little paint. Always apply the paint to your stipple brush and then tap off the excess paint onto scrap paper."
Expert Source: Alisa Harkless, in her book "Incredible Ink Techniques." Grace Publications, 2003.
Labels:
books,
crafts and hobbies,
hobbies,
leisure arts,
paper crafts
Wednesday, January 10, 2007
Project - Make a Wintery Artist Trading Card
Winter sends chills down my spine while bringing out the kid in me at the same time. Join me in embracing the cold with this quick and easy artist trading card or ATC.
Tiny Snowflakes Grace an Artist Trading Card (click to enlarge)
Materials & Tools
· White Card Stock, 2.5 by 3.5-inch
· Turquoise or Other Blue Card Stock, 2.5 by 3.5-inch
· White Vellum Scrap
· 1 piece of silver metallic or hologram style ribbon, 1/2-inch wide by roughly 3 inches long
· 3 tiny (1/2-inch) plastic snowflake ornaments, the kind used to decorate miniature desktop Christmas trees
· Scrap piece of card stock, any color, about the width of the ribbon
· Glue stick, double-stick tape or your adhesive of choice for applying the paper layers
· 1/4-inch diameter pop dots by All Night Media, for adhering the snowflakes to the ribbon
· Good pair of comfortable, teflon-like coated scissors, like Velvet Touch Scissors by Armada
· Fiskars Paper Edgers, with the postage stamp edging
· Paper trimmer, like 12" Portable Paper Trimmer by Fiskars
· 1 fl. oz. bottle of Scribbles 3D Paint in Glittering Crystal
The Steps
1. Using the paper trimmer, cut two identically-sized pieces of card stock -- one white, the other blue.
2. Tear one of them lengthwise -- your choice, depending on which color you'd like to layer on top.
3. Mount the torn card stock on top of the other piece. Using your fingers, rub the torn edge to make it roll back a bit.
4. Tear and crumble the piece of vellum then wrap it around the layered ATC base. Tape the vellum on the back of the card to secure it in place.
5. Cut a 3.5 inch piece of metallic holiday ribbon. Tape it to a piece of card stock.
6. Mount the snowflakes on the front of the mounted ribbon using the adhesive dots. If the snowflakes are for tree decor, remember to cut off holes and threads first.
7. Using the Fiskars scissors, cut the metallic ribbon at an angle in between the snowflakes.
8. Mount the individual snowflake embellishments onto the front of the artist trading card using double-stick tape.
9. Using the 3D glittery paint, paint blustery swirls on the top of the vellum scrap. Be careful not to add too much paint or your vellum will bubble and warp. Be creative. Think about swirling winter breezes and Old Man Winter. Let dry overnight.
10. Share your finished ATC with a friend on a chilly winter evening.
Product Resource Guide
· Project photo taken with a 5.0 MP resolution KODAK EASYSHARE DX4530 Zoom Digital Camera
· White Card Stock - 8-1/2"x11" 50 Sheet Pack
· Riverside Paper Array® 65-lb. Card Stock, 8-1/2 x 11, Assorted Parchment Colors, 100 Sheets/Pk 01235 / RIV01235
· Vellum Paper Packs by DMD
· Scrap piece of card stock the width of the ribbon
· Glue Stick, Disappearing, Acid Free, .77, Purple
· Fiskars Paper Edgers, with the postage stamp edging
· Fiskars 12-Inch Euro Paper Trimmer
· Browse for Paper Crafts Books at Amazon.com
Article Description: Here is a simple artist trading card to make with leftover bits of vellum and holiday decor.
Subscribe to:
Posts (Atom)