Thursday, November 23, 2006

Book Review - Collage Lost and Found by Giuseppina Cirincione

Collage Lost And Found

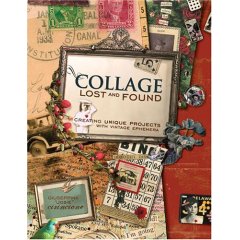
Collage Lost And Found: Creating Unique Projects With Vintage Ephemera

by Giuseppina "Josie" Cirincione
Publisher: North Light Books (May 2006)
ISBN:1581807872; Paperback : 128 pages
Reviewed By Kim M. Bayne, Paper Crafts Editor for BellaOnline.com
Rating: ★★★★★
Whether you prefer to manipulate metal, glass or paper or express your creativity through jewelry, home décor or greeting cards, you’ll find something new to oogle in this paperback by Josie Cirincione. It expands one's definition of paper crafts and collage beyond the ordinary.

Like many vintage collage artists, Josie is fond of layering imagery from the early to mid-20th Century, and I couldn’t help but notice her "Rosie the Riveter" obsession with hardware and electrical store finds. Then there are the enticing works in need of soldering irons. Projects range from a short 30 minutes for pulling together a simple domino pendant (page 86) to an afternoon mulling over vintage photos to embellish an elaborate metal family album (page 66).

One of my favorite projects is "A Preference for Leather" (page 116), a set of framed images mounted on a leather band. By sewing soldered microscope slides to an eyeleted scrap of leather, you can create a unique wristband for a night out with the girls. I pondered the idea of collaging photos of my daughter’s female relatives; aunts and grandmas and maybe even me, to combine the stories of one’s heritage with the timelessness of leather. It’s a thoughtful gift, whether the recipient is partial to Bohemian couture or loves sporting a wearable scrapbook.

Another fave project is "Magnetic Attraction" (page 118), a message center built of galvanized sheet metal and glass. In search of wall art to fill those odd and bare places? Create a thin horizontal familial grouping, complete with small magnets for posting notes. I do wish the author had provided dimensions of the pieces of metal and glass she used, since I wanted to follow her example. I’ll have to take a wild guess based on the pictures and proportions. If you decide to make this, be mindful of glass thickness, since magnets may not adhere if the overlay is too thick. While making the magnets, consider substituting adhesive page pebbles for the glaze, depending on the look you wish to achieve.

On pages 120 and 121, the author reproduces some vintage photographs, postcards and playing cards for use in assemblage. Although this section is titled "Collage Clippings," I wouldn’t suggest cutting out the ephemera. Take your book to the nearest copy center and make high quality single copies for your personal use, as suggested by the publisher. Photocopies are more versatile anyway, especially if you like playing with image transfers (pages 48-49).

Most collage is made for telling a story, and you’ll find several examples of artistic pictorials in "Collage Lost and Found." From paper shipping tags masquerading as historical bookmarks to tiny mint tins recycled into ancestral pocket shrines, this book is fun to browse even if a glue bottle is nowhere in sight. Dying for an excuse to rummage through your father’s desk drawers for old receipts? Go buy this book.


Product Resource Guide
· Buy at Amazon.com
· Making Memories Clear Page Pebbles - Large Round
· Black & Decker CI500S Dual-Temp Soldering & Craft Iron
· Lead-Free Solder
· Browse for more Paper Crafts Books at Amazon.com

Article Description: Breathe life into your paper crafts style by expanding your definition of collage.

Thursday, November 16, 2006

Project - Celebrate Fall with a Faux Copper Card Topper

I love the fall. Leaves turning colors. Greens blending into coppers and tans. It's the deep, rich palette of the season that calms me. Thanksgiving in the United States will soon be here and I'm inspired to create a few handmade invitations for a dinner party.

Copper is one of my favorite ways to express autumn, and I love its look as leaves. Unfortunately, when I use real copper -- even a small bit -- for an embellishment, the greeting card often feels heavy, floppy or lopsided. I've decided to fake it by substituting mirrored paper. Here's how I did it.

Fake Copper Leaves Embellish a Fall Card
Fake Copper Leaves Embellish a Fall Card (click to enlarge)

Materials & Tools
· White Ink Jet Textured Note Cards with Envelopes, 4.25 by 5.5-inch, Heavyweight, by Avery
· Copper or burnt orange metallic or mirror-finish paper
· Scrap piece of card stock for mounting the stamped leaves
· Muted green handmade textured paper
· Deep purple or maroon colored card stock
· Woodblock Stripe Decorative Paper - Copper on Sienna, as found at Paper Mojo
· Gray cardstock
· Small leaf skeleton rubber stamp, like 1.5-inch size by Susan's Delusions
· Black solvent inkpad, like Jet Black by StazOn
· Glue stick
· Good pair of comfortable, teflon-like coated scissors, like Velvet Touch Scissors by Armada
· Paper trimmer, like 12" Portable Paper Trimmer by Fiskars
· Craft knife
· Metal ruler or straight edge
· 1/2-inch black foam adhesive squares, Peel and Stick, by Therm O Web

The Steps
(Click to enlarge images. Click back button to return to article.)

1. Using a template program to line up your text and an inkjet printer, add a Thanksgiving or other seasonal greeting to the inside of a note card.
2. Cut a small piece of copper-colored mirror paper, no bigger than 4 by 4 inches. Using permanent black ink, rubber stamp three small skeleton leaves on the paper...yes, you're looking at unmounted stamps. Notice that I stamped a bigger leaf on the paper, too. I wanted to compare the looks to see which leaf size and shape I preferred.


3. Mount the copper paper on card stock for stability then carefully cut out the leaves. There's something about the stark black ink on the coppery paper that fools the eye into seeing real metal.
4. Cut a 5 by 6 inch piece of muted green handmade textured paper. Glue to the front of the note card, using a straight edge and craft knife to trim the excess. For more texture, try decorative paper with bamboo or falling leaves designs.
5. Cut a 3 by 4.5 inch piece of deep purple or maroon colored card stock, depending on your color preference. Glue to the front of the green paper.
6. Cut a piece of 1.75 by 4.5 inch piece of copper striped sienna colored decorative paper. Glue to the front of the purple card stock.
7. Cut a piece of 3 by 3 inch gray cardstock. Glue to the front of the copper striped paper.
8. Gently tear the edges of the layered papers. You can also tear before gluing, but I liked the odd edges that came from peeling and tearing the glued layers.
9. Using foam squares, mount each of the leaves in place on top of the gray cardstock. I positioned the cut-outs in a circle to give the feeling of wind blowing fallen leaves.
10. Now slip your finished card into the envelope and send it on its way.


Product Resource Guide
· Most project photos taken with a 5.0 MP resolution KODAK EASYSHARE DX4530 Zoom Digital Camera
· Note Cards with Envelopes
· Mirror-finish paper
· Stripe Decorative Paper
· Black solvent inkpad
· Foam adhesive squares
· Bamboo leaf paper
· Falling leaves paper
· Browse for Paper Crafts Books at Amazon.com

Article Description: Like the look of copper but not the weight? Adorn the front of a Thanksgiving card with lightweight leaves made of your favorite metallic paper.